Title:Using GR-SAKURA to solve a challenge at home
Displayed Name:Tomomi Kitamura
| Concept / Overview |
|---|
| Hi there! I’m Tomomi Kitamura (@tomomi_ktmr). I’m the mother of two daughters aged 6 and 10. Until seven years ago, I made robots and electronic gadgets, but decided to take a break when I became pregnant with my younger daughter. I also toyed around with Arduino at the time. Responding to the recent advent of IoT and my own itch to make something, I got my hands on GR-SAKURA which, when used with an Arduino-like board, turns into an amazing combination that comes network-connected and ready to read any SD card!! (I look back on a time when it was difficult just to mount products.) This set was introduced at an IoT study meeting (called IoT LT) sponsored by Softbank. |
Solving a problem which vexed my daughter
To make best use of my effort, I tried to think of something helpful to construct. My younger daughter, who had entered first grade, often forgot to give me letters and handouts from school.
I had gone through the same problem with my older daughter. I was determined not to repeat the same unfortunate cycle of angry mother and crying daughter, so I set about using GR-SAKURA to create a gadget to help my younger daughter enjoy giving me handouts she had brought home from school.
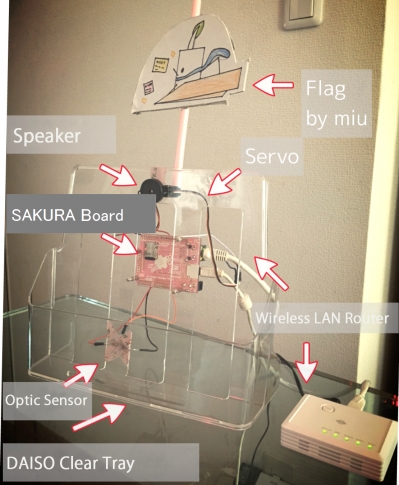
To ensure that my daughter would actual deliver the school notices she brought home, I decided to create a gadget producing a fun reward — involving movement and sound — when a handout was inserted into the slot.

Keeping it simple
I used a simple mechanism to design the gadget so that when it sensed that a piece of paper had been deposited, the servomotor would be activated to produce a sound. I was hoping to keep it basic enough so that my older daughter (aged 10) would understand the mechanism as well.
I used an optical sensor (CdS sensor) as my detection mechanism; when a letter was deposited, the sensor would detect darkness and recognize that a threshold had been reached.
As far as the sound was concerned, I knew that today’s kids would never be satisfied with a mere beep. Since the GR-SAKURA came with SD capability, I recorded both music and a voice message, and programmed it to the SD. Actually, I recorded my older daughter playing the piano and my younger daughter (the daughter with the school note issue!) saying a message. I involved both daughters in the production process, including them from the stage likely to provide maximum enjoyment and interest on their part.
Network function resolves Mom's issue
The thing is, I discovered that I was actually not aware when a letter had been deposited… That called for an additional “mail notification” mechanism to counter overlooked or forgotten mail. We installed a new mechanism that changed the color of our dining room lighting.
These functions may seem difficult at first glance, but were easy to install using the IFTTT web service.
Traial run
We created “otegami” (“letter” in Japanese), a gadget guaranteeing delivery of school letters and handouts at home. When a handout was placed in a clear tray, it activated a sound as well as a flag movement. That prompted an e-mail to me and changed the color of the dining room lights to red. As expected, I noticed the red lighting. We made a short video of the trial run.
(https://youtu.be/xqYPw-6wLeQ)
Required items
*CdS cell 30 yen
(Akizuki Denshi Tsusho Co., Ltd. http://akizukidenshi.com/catalog/g/gI-00110/)
*Resistor 10kΩ approximately 1 yen
(Akizuki Denshi Tsusho Co., Ltd. http://akizukidenshi.com/catalog/g/gR-25103/)
*Piezoelectric speaker 50 yen
(Akizuki Denshi Tsusho Co., Ltd. http://akizukidenshi.com/catalog/g/gP-01251/)
*Servomotor E-SKY EK02 0500 about 400 yen
*Clear tray (Daiso Industries Co., Ltd.) 100 yen
*Spacer (M2.6 hexagonal screw) for attaching GR-SAKURA
(Akizuki Denshi Tsusho Co., Ltd. http://akizukidenshi.com/catalog/goods/search.aspx?keyword=M2.6&maker=myg&goods=&number=&name=&min_price=&max_price=&last_sdt=&sort=&style=T&search.x=0&search.y=0)
(Akizuki Denshi Tsusho Co., Ltd. http://akizukidenshi.com/catalog/g/gP-07324/)
*Breadboard jumper cord (pliable jumper wire)
(Akizuki Denshi Tsusho Co., Ltd. http://akizukidenshi.com/catalog/g/gC-05159/)
*MicroSD 2GB about 700 yen
*Philips hue Philips LED smart lighting system (lighting changes via a wireless system)
(http://www2.meethue.com/ja-JP)
Assembly
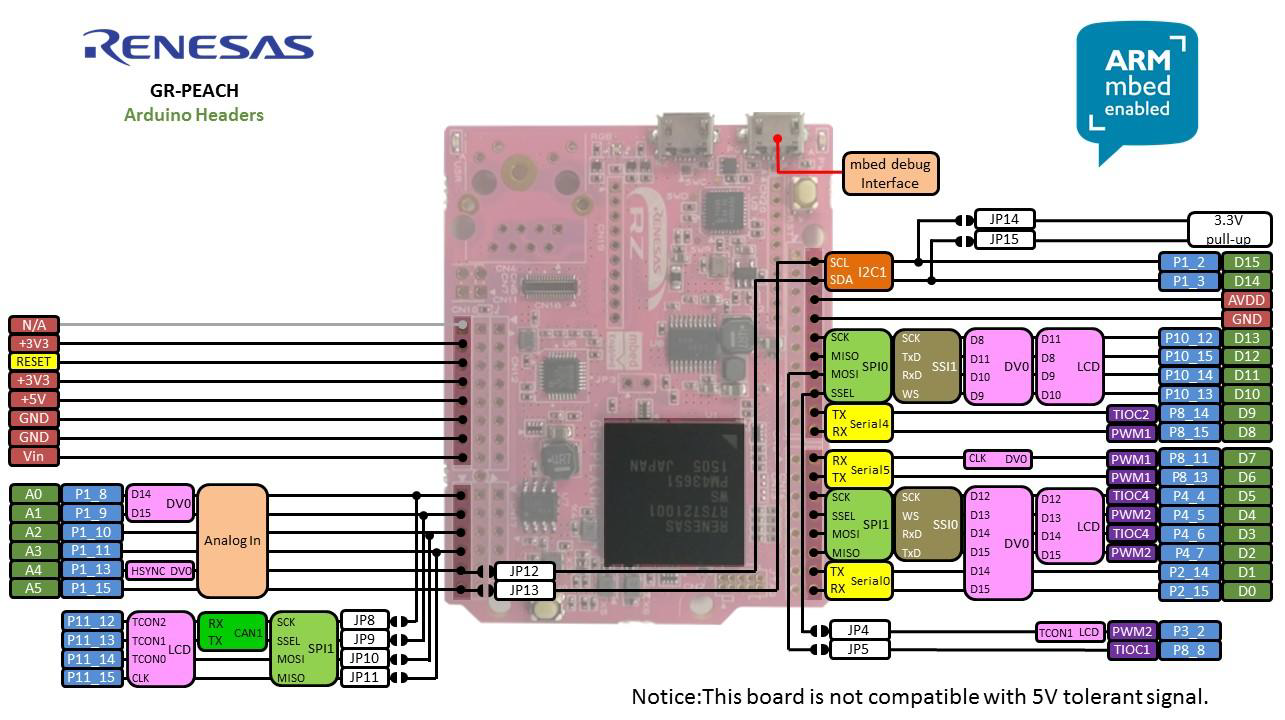
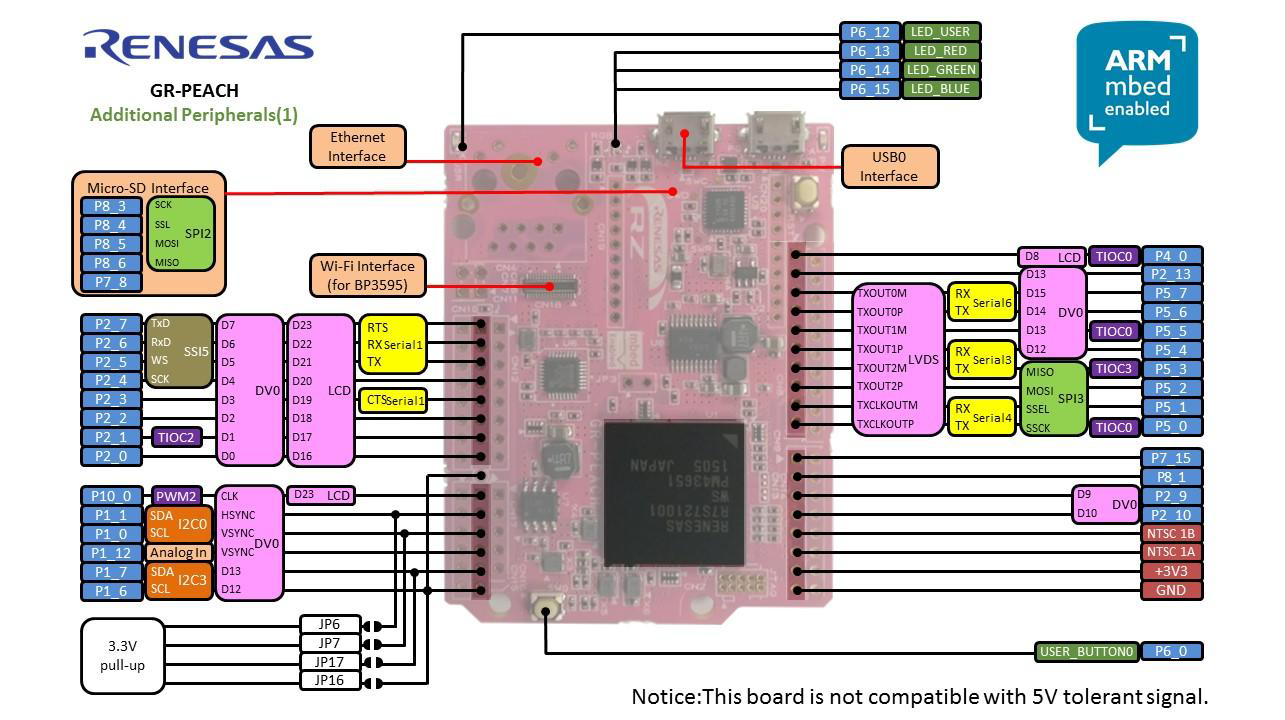
We soldered each sensor directly with the pliable jumper cord, then attached the sensors to the GR-SAKURA. Take care to not overheat the sensors while soldering.
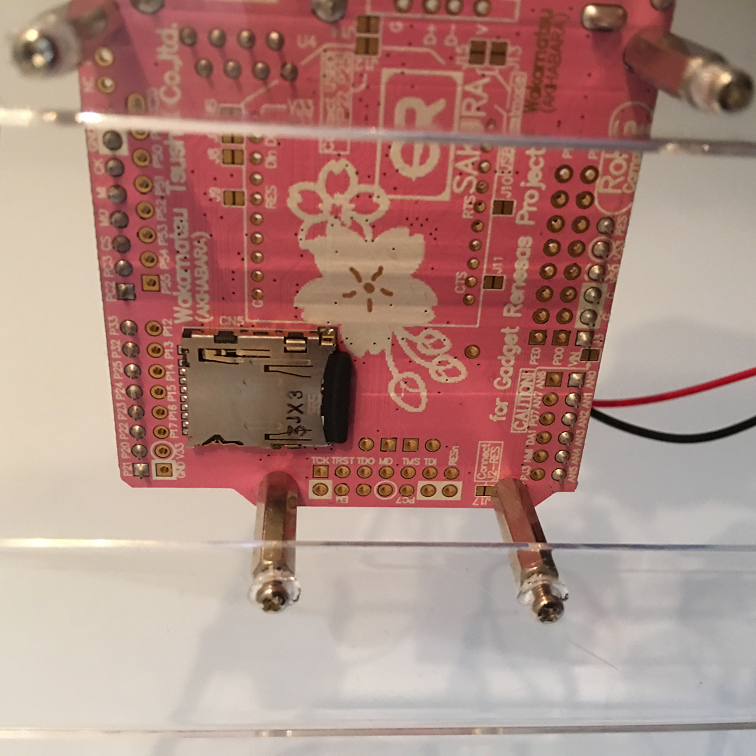
The clear tray is heat-sensitive, so use a soldering iron to melt holes in the tray, cleanly finishing the holes off with a screwdriver, and then attach the GR-SAKURA to the tray with the spacers. There happens to be a slit in the reverse side of the clear tray, enabling SD card retrieval at any time. The remaining parts are relatively light, and can be attached by double-sided tape, cute masking tape, or hot glue.
Wiring diagram

Front
Reverse
Attached to clear tray
Sketch
Here is the sketch I made. It is not entirely correct to say that I made it, as I simply modified an existing template (GR-SAKURA_MP3_WAV_V2.07.zip) for data retrieval from SD to the mp3 wav to determine the CdS sensor level, activate the servomotor, and add IFTTT (e-mail notification and lighting control). An added function allowed me to push a button on the reverse of the gadget to reset the system after the gadget sensed arrival of a letter and notified me.
/* * gr_sketch.cpp - wavmp3p library * Copyright (c) 2015 Mitsuhiro Matsuura. All right reserved. * * This program is free software; you can redistribute it and/or modify * it under the terms of the GNU General Public License as published by * the Free Software Foundation; either version 2 of the License, or * (at your option) any later version. * * This program is distributed in the hope that it will be useful, * but WITHOUT ANY WARRANTY; without even the implied warranty of * MERCHANTABILITY or FITNESS FOR A PARTICULAR PURPOSE. See the * GNU General Public License for more details. * * You should have received a copy of the GNU General Public License * along with this program; if not, write to the Free Software * Foundation, Inc., 59 Temple Place, Suite 330, Boston, MA 02111-1307 USA */ /* This template is based on GR-SAKURA Sketch Template V2.07 */ #include#include #include #include #include #include // servo ^^ #include #define INTERVAL 50 int val=0; // servo vv #define LED_ON HIGH #define LED_OFF LOW #define Serial Serial1 #define SW_PAUSE 5 #define SW_SKIP 4 #define SW_ON 0 #define SW_OFF 1 Servo servo0; // IFTTT ^^^ //#define USE_SERIAL // Enter a MAC address and IP address for your controller below. byte mac[] = { 0xDE, 0xAD, 0xBE, 0xEF, 0xFE, 0xED }; // MAC // Initialize the Ethernet client library // with the IP address and port of the server // that you want to connect to (port 80 is default for HTTP): EthernetClient client; char server[] = "maker.ifttt.com"; // IFTTT strings char eventName[] = "otegami"; // Enter THIS event name for your recipe char secretKey[] = "d6nhkuCDkhqCgQFAgNtNMr"; // Enter your secret key char s[128]; int val1, val2, val3; int frg = 0; // IFTTT vvv WavMp3p wavmp3p(44100); File root; static void cyclic_handler(void); void setup() { // Serial.begin(9600); // servo ^^ pinMode(PIN_SW, INPUT); servo0.attach(9); servo0.write(90); // servo vv Serial.begin(115200); Serial.println("wav & mp3 player"); pinMode(PIN_LED0, OUTPUT); digitalWrite(PIN_LED0, LED_ON); while(!SD.begin()) { Serial.println("Card failed, or not present."); digitalWrite(PIN_LED0, LED_OFF); delay(1000); digitalWrite(PIN_LED0, LED_ON); } pinMode(SW_PAUSE, INPUT_PULLUP); pinMode(SW_SKIP, INPUT_PULLUP); MsTimer2::set(100, cyclic_handler); MsTimer2::start(); // IFTTT ^^^^ pinMode(PIN_LED0, OUTPUT); // check to start pinMode(PIN_LED1, OUTPUT); // check to begin Ether pinMode(PIN_LED2, OUTPUT); // check to connect IFTTT pinMode(PIN_LED3, OUTPUT); // check to finish sending HTTP pinMode(PIN_SW, INPUT); // Open serial communications and wait for port to open #ifdef USE_SERIAL Serial.begin(9600); // for debug while (!Serial.available()) ; // key wait Serial.println("start to begin Ether."); #endif digitalWrite(PIN_LED0, HIGH); // start the Ethernet connection: while (!Ethernet.begin(mac)) { #ifdef USE_SERIAL Serial.println("Failed to configure Ethernet using DHCP"); #endif } digitalWrite(PIN_LED1, HIGH); // success to begin #ifdef USE_SERIAL // print your local IP address: Serial.print("My IP address: "); // for debug Serial.println(Ethernet.localIP()); // for debug Serial.println("Push blue SW on GR-SAKURA to start."); // for debug #endif // IFTTT vvvv } #if 1 // t@C¼ðßÅ¿·éTv void loop() { // Ķ // wavmp3p.play("1.mp3"); // wavmp3p.play("2.mp3"); //wavmp3p.play("1.wav"); // wavmp3p.play("2.wav"); val=analogRead(0); //Serial.println(val); //入力された値をモニターに出力 delay(500); // IFTTT ^^^ // 青ボタンを押した時にfrgを0に if (digitalRead(PIN_SW) == LOW) { frg=0; // wav play ^^^ wavmp3p.play("2.mp3"); } if(frg == 0 && val > 390){ frg=1; // wav play ^^^ wavmp3p.play("1.wav"); // servo move servo0.write(45); delay(1000); servo0.write(90); delay(1000); servo0.write(135); delay(1000); servo0.write(90); delay(1000); servo0.write(45); delay(1000); servo0.write(90); delay(1000); servo0.write(135); delay(1000); servo0.write(90); delay(1000); // if you get a connection, report back via serial: if (client.connect(server, 80)) { digitalWrite(PIN_LED2, HIGH); #ifdef USE_SERIAL Serial.println("connected to IFTTT server"); // for debug #endif // Make a HTTP request: sprintf(s, "GET http://maker.ifttt.com/trigger/%s/with/key/%s HTTP/1.1", eventName, secretKey); #ifdef USE_SERIAL Serial.println(s); // for debug #endif client.println(s); client.println("Host: maker.ifttt.com"); client.println("Connection: close"); client.println(); digitalWrite(PIN_LED3, HIGH); delay(500); } else { // if you didn't get a connection to the server: #ifdef USE_SERIAL Serial.println("connection failed"); // for debug #endif } digitalWrite(PIN_LED2, LOW); digitalWrite(PIN_LED3, LOW); } if (client.available()) { char c = client.read(); #ifdef USE_SERIAL Serial.print(c); #endif } if (!client.connected()) { client.stop(); } // IFTTT vvv } #else // This sample plays the .wav or .mp3 in a card in order. // J[hÌ.wav Ü½Í .mp3 t@Cð©Â¯½ÉĶ·éTv char path[1024][8+1+3+1]; void printDirectory(File dir, int numTabs) { while(true) { File entry = dir.openNextFile(); if(!entry) { return; } if(entry.isDirectory()) { strcpy(path[numTabs], entry.name()); printDirectory(entry, numTabs + 1); } else { char fpath[1024] = ""; for(uint8_t i=0; i< numTabs; i++) { strcat(fpath, path[i]); strcat(fpath, "/"); } strcat(fpath, entry.name()); Serial.print(fpath); char *res = wavmp3p.play(fpath); if(res)Serial.println(res); } } } void loop() { root = SD.open("/"); printDirectory(root, 0); Serial.println("done!"); } #endif // The below handler enables to skip or stop. // êâ~CXLbv@\ÌTv static void cyclic_handler() { static int ct_pause = 0; if(SW_ON == digitalRead(SW_PAUSE)){ if(ct_pause == 2){ if(wavmp3p.read_pause()){ wavmp3p.pause(0); digitalWrite(PIN_LED0, LED_ON); }else{ wavmp3p.pause(1); digitalWrite(PIN_LED0, LED_OFF); } ct_pause++; }else if(ct_pause < 2){ ct_pause++; } }else{ ct_pause = 0; } static int ct_skip = 0; if(SW_ON == digitalRead(SW_SKIP)){ if(ct_skip == 2){ wavmp3p.skip(); digitalWrite(PIN_LED0, LED_ON); ct_skip++; }else if(ct_skip < 2){ ct_skip++; } }else{ ct_skip = 0; } }
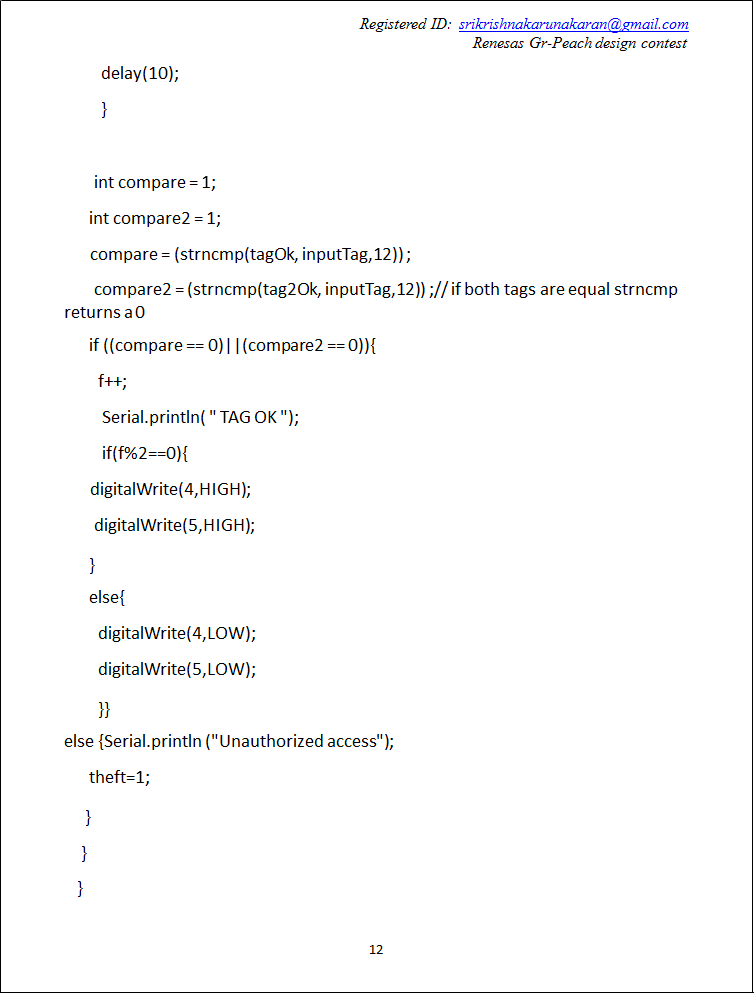
IFTTT is very handy!
IFTTT allows Web services such as Facebook, Twitter, and e-mail to be linked. It can be set up using a Web application (http://ifttt.com). There are many services facilitating such links, one of which is MakerChannel, which works to link Arduino. I used it to dispatch e-mail, etc. from Arduino via IFTTT.
Reference sites / Template
I used the following references to create this gadget.
- No 5V output during the initial stage.
Use the pink-hued GR-SAKURA microprocessor and LED to create a breathalyzer for your next cherry blossom outing! http://liginc.co.jp/264119
- How to use a CdS sensor
#5 Try using optic sensor for Arduino data entry! http://deviceplus.jp/hobby/entry_005/
- Serial communication using Web compiler with GR-SAKURA
Gadget Renesas Community: how to use and apply SAKURA (see bottom of page) http://japan.renesasrulz.com/gr_user_forum_japanese/b/weblog2/archive/2015/07/05/sakura.aspxn
- How to use a servomotor
SAKURA sketch reference → servomotor http://gadget.renesas.com/ja/reference/sakura/library_servo.html
- How to use SD to view wav and mp3
Web compiler template: GR-SAKURA_MP3_WAV_V2.07.zip
- How to use IFTTT
Web compiler template: GR-SAKURA_IFTTT_V2.03.zip
Occupation: web development and operation/maintenance, and IT adviser
Until 6 years ago, Kitamura was a robot hobbyist (HN: “miu mama”) who contributed to ROBOCON, an online robotics magazine. She used her second pregnancy as an opportunity to explore electronics as a hobby.
In recent years, she has assisted the Information and Communication Technology Rescue Team, an NPO supporting the disabled, and has refocused her attention on robotics as her older daughter (aged 10) has gained an interest in that area.
She continues to study IT and IoT which are easily accessible to all.
Technical notes and journal: Mom, robotics, and occasionally childrearing
http://ameblo.jp/ktmrke/
Information and Communication Technology Rescue Team (NPO)
http://www.rescue-ict.com/wp/
Instagram:https://www.instagram.com/tomomi_ktmr/

