
Title:Bringing life to stuffed animals with Node.js(Johnny-Five)and GR-ADZUKI!
Displayed Name:n0bisuke

| Concept / Overview |
|---|
| I found out that we can use JavaScript, the web language, to control Renesas GR-boards. So I decided to program GR-ADZUKI using Johnny-Five, a Node.js library. |
Self-intro
Hi, I am “n0bisuke”. I work for dotstudio Co., Ltd.
I am a Web-system engineer and often use Node.js at work. When I heard Node.js runs on GR-ADZUKI, I decided to try making something with it.
GR-ADZUKI
Renesas GR-ADZUKI board is a dedicated version of an Arduino-like board, supporting a DC motor, servo, sensors (distance, acceleration, geomagnetism, etc.), and a battery box without any additional circuits. Here is the official site.
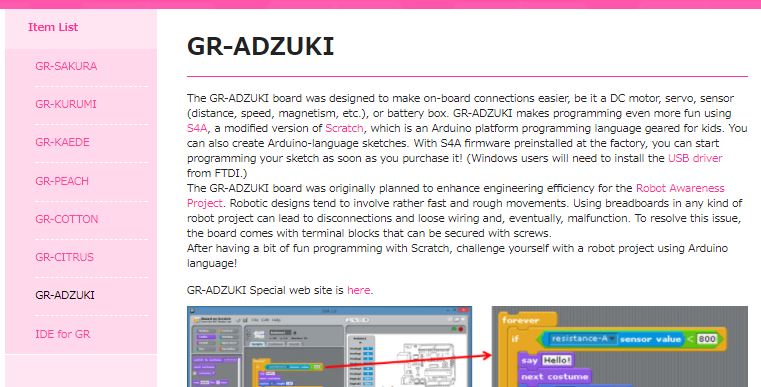
You can enjoy programming GR-ADZUKI with SA4, a derivative version of the Scratch application program which runs on various Arduino boards. You can also develop a sketch code with IDE4GR, the dedicated version of Arduino-IDE for GR-boards.
Since the SA4 firmware is pre-installed in the default set-up on GR-ADZUKI, you can run a Scratch code right after unpacking your purchase. Make sure you install the FTDI USB driver if you are using a Window PC.
GR- ADZUKI was proposed in “Robot Awaking Project” enabling anyone to be able to build a toy robot with no hassle.
When you use a breadboard and wires to build a toy robot, the robot’s sudden movements often rip wires out of the breadboard and eventually the robot breaks. To minimize these problems, terminals that can be fastened with a screw are also installed on GR-ADZUKI as default.
Of course, you can program a full-blown code with Arduino C++ language after enjoying Scratch programming. The GR-ADZUKI is ready for plug-in motors and sensors, enabling easy and quick toy robot development.
Johnny-Five
Johnny-Five is the JavaScript Robotics and IoT platform, and is based on Node.js for controlling a microcontroller system.
use Johnny-Five with GR-ADZUKI
The primary platform is Arduino boards. But now it is supported by many different boards including GR- ADZUKI, as described in this Japanese article : “Node.jsからGR-ADZUKIを動かそう! – Programming GR- ADZUKI with Node.js.”
To use Johnny-Five with GR-ADZUKI or Arduino, you need to install the middleware code called “Firmata” on your board. You also need to install Node.js on your PC and send commands to your board via the USB serial cable.
If you are using a Linux machine such as Raspberry Pi or Intel Edison, all you need to do is install Node.js on the platform.
Control GR-ADUKI with Node.js
Now I would like to show you how to control GR-ADZUKI with Node.js. I am using following Mac system. Similar steps apply to Windows PC users as well.
- Mac Book Pro (Retina, 13-inch, Early 2015)
- macOS Sierra
- Node.js v8.4
Install Firmata on GR- ADZUKI:
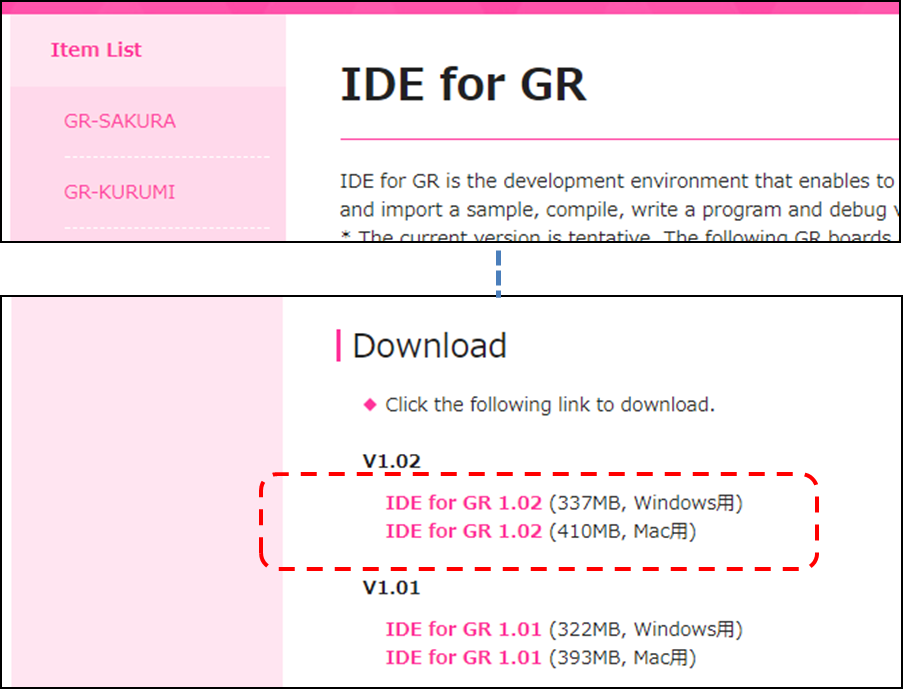
Install IDE for GR:
First install “IDE for GR” on your Mac or PC. You can download here. I am using the Mac system so that I installed the Mac version of “IDE for GR 1.01”.
Double-click the downloaded dmg file and invoke the installer. Then drag and drop the IDE4GR icon in the Applications folder shown in the right side of the screen.
After this, select the IDE4GR icon and invoke the application. If you see the following window, the installation is successfully completed. I think you’ll see that IDE4GR GUI looks like Arduino IDE.
Write the Firmata program:
Connect GR-ADZUKI to your Mac (or PC) via a micro USB cable.
Then select GR-ADZUKI from IDE4GR [TOOL] --> [MCU Board] --> [GR-ADZUKI].
Then select the appropriate port from [TOOL] --> [Serial Port] --> /dev/cu.usbserial-XXXXX. The port number differs depending on each computer. Search for the keyword “usbserial” to identify the corresponding port. If you cannot find the corresponding port, please refer to the section “What to do when you can’t find the port” described later. I encountered this problem when I connected the board. You must be patient and try it several times.
Next, you need to select Standard Firmata from [File] --> [Sketch Examples] --> [Firmata] --> StandardFirmata.
Then you will see the following code.
Click the arrow icon marked by the red box shown below. This is how you will compile and write the code in your GR-ADZUKI board. Give the board few 10 or 20 seconds to compete his work. Do not unplug the USB cable, as you might break the MCU on the board.
When you see the message “Completed writing the code on the board,” then the task is successful.
When no USB port is found:
Sometimes, the Mac (or PC) does not recognize the board even though it is plugged in, resulting in no USB serial found. If you experience this trouble, please check the following:
Check that the slide-switch on GR-ADZUKI is set to “Sketch.”
You can see two slide switches on the board shown below. You must set the upper switch, next to the “GR” logo, to the “USB” side (left) and the bottom switch to the “Sketch” side (left).
GR-ADZUKI is connected to the Mac (or PC) with a micro-USB cable:
The connection may be loose so that a contact-failure occurs somewhere inside the connector. Try re-plugging the cable again.
Try switching the cable to a different USB port on the Mac or PC.
Sometimes my Mac rejects bad cables, and can’t find USB serial. Try using a port on the other side of the PC (which used less frequently).
Replace the cable:
Some PCs don’t work with particular cables. Try replacing the USB cable to new one. In my case, as soon as I switched to a new cable, the problem was solved. (Ha ha!)
Let’s try controlling an LED on GR-ADZUKI
First, blink an LED.
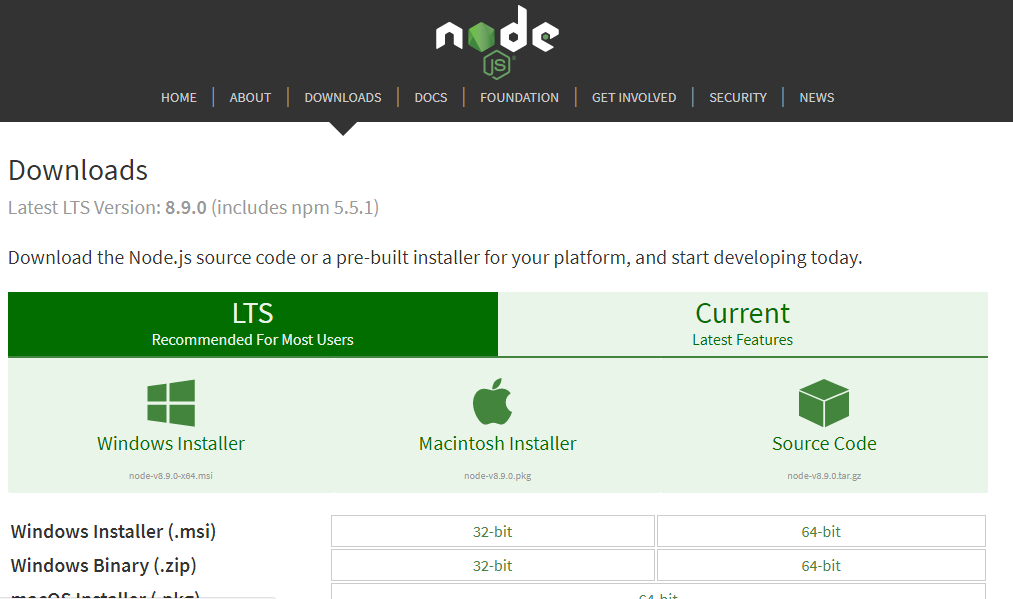
We are going to start writing the Node.js code from now on, so if you have not installed the Node.js, please check this article (Japanese only). You should download the newest version from the official site.
Prepare your project
Make a folder with any name you like.
$ mkdir myproject
Go to the folder you just made.
$ cd myproject
Prepare the package.json in the myproject folder, which is the starting point of the Node.js project. In many cases, npm int command is used for this task. The “package.json” and “package-lock.json” files are created with this command.
$ npm init -y
Install the library and set-up the program
Install Johnny-Five with the following command:
$ npm i --save johnny-five
This command creates new folder “node_modules” in the current folder, where the johnny-five and corresponding libraries are installed. In the Node.js program, method “require( )” allows use of the specified library.
Now let’s prepare file “led.js” in the current folder:
//led.js
'use strict';

const five = require('johnny-five');
const board = new five.Board({});

board.on('ready', () => {
    const led = new five.Led(6);
    led.blink(1000);
});
At this point, the myproject folder includes led.js, package.json, package-lock.json, and node_modules files.
Execution
Now let’s execute the program. Before entering the command, make sure the bottom slide switch on GR-ADZUKI is set to the Scratch side.
$ node led.js
As soon as you enter the $ node led.js command, the terminal screen on your PC shows the following messages:
1506228306889 Available /dev/cu.usbserial-DQ000DLG
1506228306907 Connected /dev/cu.usbserial-DQ000DLG
1506228311987 Repl Initialized
>>
LED #6 on GR-ADZUKI will start blinking.
Pressing Control + c two times terminates the program.
Application – Blink a different LEDs
The official page indicates that LEDs on GR-ADZUKI are assigned to pins 6,9,10,11,12, and 13. Statement “new five.Led(6)” specifies LED on pin 6. If you modify this statement to the following statement, LED on pin 11 should start blinking instead of pin 6. Then your modification was successful.
const led = new five.Led(11);
When an error occurs
When you encounter the following errors, please check the switch position on the board. Make sure the switch is set to the Scratch side.
1506227284778 Device or Firmware Error A timeout occurred while connecting to the Board.

Please check that you've properly flashed the board with the correct firmware.
Use a servo motor with GR-ADZUKI
I used the servo-motor “9g SG-90” which is indicated in the official site.
Please connect the servo-motor’s cables to GR-ADZUKI shown below.
When viewing the cables from the front, cables must be arranged in order of yellow, red, brown, from the left side. Add program servo.js to the folder of led.js.
//servo.js
'use strict';

const five = require('johnny-five');
const board = new five.Board({});

board.on('ready', () => {
    const servo = new five.Servo(4);
    servo.sweep();
});
As the official site shows the servo-motor pin is assigned to pin 4, make the servo-motor statement as “new five.Servo(4)”. To execute the program, enter the following command:
$ node servo.js
Is it working?
I hope the motor turn properly. When I used the Arduino board to run a servo-motor, I got confused about where the cables should be connected. But GR-ADZUKI has dedicated pins just for the servo-motor, making life much easier!
Summary
By downloading the Firmata code to GR-ADZUKI, we could control the servo motor with Node.js. In addition, GR-ADZUKI provided a function that makes it easy to control a robot with optical sensors, DC motors, etc, I hope you try these sensors in the near future!
By using the Web-based language Node.js, it is easy to link to Web servers and integrate IoT devices. And I think it will be easier for Web-based engineers to get started with embedded applications.
If you are a web-system engineer, I hope this article encourages you to start fooling around with electronic gadgets and robots. If you are an embedded system engineer, this is also a good time to get used to web applications.
Born in 1989. He served as an officer of IT venture company at Iwate Prefectural University.
After completing graduate school, he joined LIG Corporation as a web engineer and engaged in website developments. He started dotstudio Co., Ltd. in July 2016 and is active mainly in the IoT domain.
He serves as a board member of IoTLT, Japan's largest IoT community, and the JavaScript Robotics community NodeBots, and is an active evangelist of Milkcocoa, an IoT backend service.
Microsoft MVP Visual Studio and Development Technologies (Node.js)
